Homemade Honey Marshmallows (Without Corn Syrup)
Homemade honey marshmallows are naturally sweetened (no corn syrup), yet still have that classic marshmallow texture and taste. And, you don’t need a candy thermometer to make them!

Something about cooler weather makes you want to cozy up with a mug of oat milk hot chocolate loaded with fluffy marshmallows. Although these homemade honey vanilla marshmallows are made with unrefined sugars unlike regular marshmallows, they still have sugar and are definitely a special treat.
You can easily customize them by adding additional flavors to naturally color your marshmallows for many different variations.
Ingredients
- Water – helps the gelatin firm up and is necessary for creating the honey syrup.
- Gelatin – I highly recommend using high-quality grass-fed gelatin instead of the gelatin found at most grocery stores.
- Raw honey – used in place of corn syrup that is used in store-bought marshmallows.
- Vanilla extract – helps to flavor the marshmallows.
- Tapioca starch and powdered sugar – prevent the marshmallows from sticking together. I find that a mix of the two has the best flavor. All powdered sugar tastes too sweet and using only tapioca starch tastes a bit too starchy.
- Kosher salt – just a pinch helps to balance out the sweetness.
How To Make Marshmallows
Step 1. Add half of the water to the bowl of a stand mixer with the whisk attachment, and sprinkle gelatin over the top. Let it bloom (soak up the water) for about 10 minutes.

Step 2. Combine the starch and the powdered sugar in a large mixing bowl. Grease a square pan and dust with some of the powdered sugar mixture. Set aside.

Step 3. Make the honey syrup by bringing the remaining water and honey to a boil in a small saucepan over medium-high heat. Give the mixture a quick stir and then don’t stir it again. Allow it to boil for 10 minutes (or until the mixture has reached 240 degrees F if using a candy thermometer – the soft ball stage). Remove it from the heat.

Step 4. Turn your stand mixer on low speed and very slowly pour the hot honey syrup into the bowl. Increase to high speed for 8-10 minutes.
Step 5. It’ll look like marshmallow cream and start to form stiff peaks. Right before it’s done, add the vanilla extract, and a pinch of salt. Use a greased spatula to transfer the sticky marshmallow mixture to your prepared pan and smooth off the top. Work quickly because the marshmallow fluff will be very sticky and start to set.

Step 5. Let the marshmallows sit uncovered for at least 2 hours.
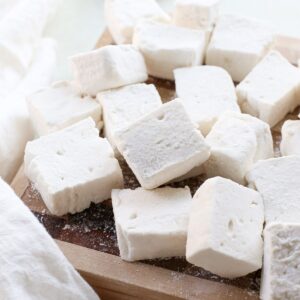
Step 6. Dust a cutting board with some of the powdered sugar mixture and grease a large knife. Flip the pan over onto the dusted cutting board. Cut the marshmallows into large or small squares for mini marshmallows. Toss the cut marshmallows in the powdered sugar mixture to coat.

Make It Your Way: Substitutions & Variations
Please remember that recipes are just a starting point.
How can you make this homemade marshmallow recipe using what you already have? Here are some ideas…
- No honey? – use maple syrup instead or use a combination such as half maple syrup + half honey. You can also use infused simple syrups.
- Out of vanilla? – add in another flavor or omit it completely.
- No tapioca starch? – sub potato starch, arrowroot powder, or corn starch, or you can omit the starch and use all powdered sugar.
- Add-ins – matcha powder, cocoa powder, or freeze-dried fruit ground into a powder for natural coloring and flavoring.
How to Store
Store homemade marshmallows in an airtight container at room temperature for up to 2 weeks. Avoid storing them in the fridge as this causes them to dry out.

How To Use
Homemade marshmallows are delicious on their own, but you can also dip them in melted chocolate, make homemade s’mores, add them to oat milk hot chocolate, or sweet potato casserole.
You can also make dairy free brown butter rice krispie treats, but you do need to let the marshmallows set first.
Frequently Asked Questions
I’ve never used a candy thermometer to make homemade marshmallows and have never had an issue, but you can use one if you’d like. The temperature is included in the recipe card.
Grease the pan with a neutral oil such as refined coconut oil or avocado oil and dust a layer of the powdered sugar mixture over the top. The marshmallows come out easily when you do these two steps first.
Use an electric mixer of some kind – either a stand mixer or an electric handheld mixer, silicone spatula to easily remove the marshmallow from the side of the bowl, fine mesh strainer (also called a sieve) to help you more evenly distribute the powder sugar mixture over the marshmallows, a large glass bowl for tossing the marshmallows in the powder sugar, and an 8×8 or 9×9 baking pan to hold the marshmallows.

More Sweet Treats
- Dairy Free Brown Butter Rice Krispie Treats
- No Churn Rainbow Sherbet Ice Cream With Fruit
- Miso Caramel (Dairy Free)
Homemade Honey Marshmallows (Without Corn Syrup)
Ingredients
- 1 cup water, divided
- 3 tablespoons gelatin
- 1 cup honey can also use maple syrup or a combination of the two
- 1 teaspoon vanilla extract or another flavor
- ¼ cup tapioca starch arrowroot powder or potato starch will also work
- ¼ cup powdered sugar
- pinch of salt
Instructions
- Add half of the water to the bowl of a stand mixer with the whisk attachment, and sprinkle gelatin over the top. Let it bloom (soak up the water) for about 10 minutes.
- Combine the starch and the powdered sugar in a large mixing bowl. Grease a square pan and dust with some of the powdered sugar mixture. Set aside.
- Make the honey syrup by bringing the remaining water and honey to a boil in a small saucepan over medium-high heat. Give the mixture a quick stir and then don't stir it again. Allow it to boil for 10 minutes (or until the mixture has reached 240 degrees F if using a candy thermometer – the soft ball stage). Remove it from the heat
- Turn your stand mixer on low speed and very slowly pour the hot honey syrup into the bowl. Increase to high speed for 8-10 minutes.
- It'll look like marshmallow cream and start to form stiff peaks. Right before it's done, add the vanilla extract, and a pinch of salt. Use a greased spatula to transfer the sticky marshmallow mixture to your prepared pan and smooth off the top. Work quickly because the marshmallow fluff will be very sticky and start to set.
- Let the marshmallows sit uncovered for at least 2 hours.
- Dust a cutting board with some of the powdered sugar mixture and grease a large knife. Flip the pan over onto the dusted cutting board. Cut the marshmallows into large or small squares for mini marshmallows. Toss the cut marshmallows in the powdered sugar mixture to coat.
- Store homemade marshmallows in an airtight container at room temperature for up to 2 weeks. Avoid storing them in the fridge as this causes them to dry out.